
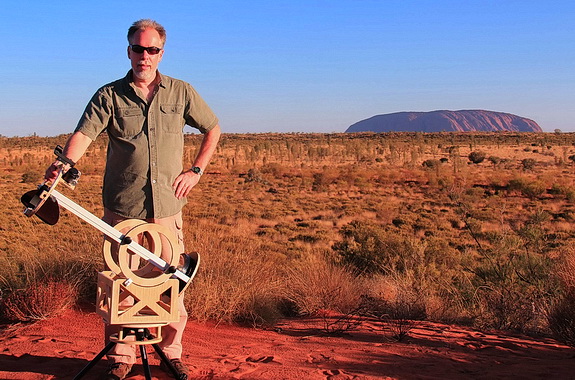
Me, the Outback Travelscope, and a bloody big rock.
(Photo courtesy George Brandie)
When I was preparing to travel to Australia for a total solar eclipse and some dark-sky observing sessions in the Outback, I decided it was finally time to rebuild my 8-inch travelscope so that it could go into my suitcase and arrive safely at my destination.
One of the most popular articles on this web site is this one, describing my airline-portable, nested 8-inch Dobsonian. That scope was a big hit with readers and I’ve logged a lot of miles with it over the years. But if you fly regularly these days, I don’t need to you how precious overhead storage space has become. I began to fear that my scope might one day be “gate checked” into the luggage hold with the rest of the suitcases — something it’s not likely to survive. So, before I headed to the Land Downunder, I sat down and designed version 2.0 of that scope: My Outback Travelscope.
Shedding the Pounds
To achieve this goal, I needed to make two major changes. First, the new scope would have to be compact enough to fit inside my suitcase with enough space left over for a few inches of protective padding. Second, it needed to go on a diet. The original scope weighed in at 25 pounds. That meant that if I packed it into my 10-pound suitcase, I have only 15 pounds of the airline’s 50-pound weight budget left over for my eyepieces, cameras, cloths, and everything else.
I started designing my outback travelscope accepting that the lightest, and most compact version was also likely to require the greatest amount of field assembly. I was fine with that because when I fly for stargazing, I usually spend a few days at my destination, so set-up and tear-down wouldn’t be a nightly event. I also decided to reuse my 8-inch, f/4.2 primary mirror, as well as the secondary mirror and holder from my original travelscope. Everything else would be built from scratch with an eye towards trimming as much weight as possible without sacrificing stability or rigidity.
A conventional Newtonian’s tube mainly serves to hold the optical elements and focuser in the correct position. The key to making a minimalist Dob is to recognize there other ways to accomplish this task. In the case of my new travelscope, the “tube assembly” consists of a secondary cage and primary mirror cell joined by a pair of aluminum struts. Arriving at the design required a lot of rough sketches, weighing components, and a generous helping of trial and error.
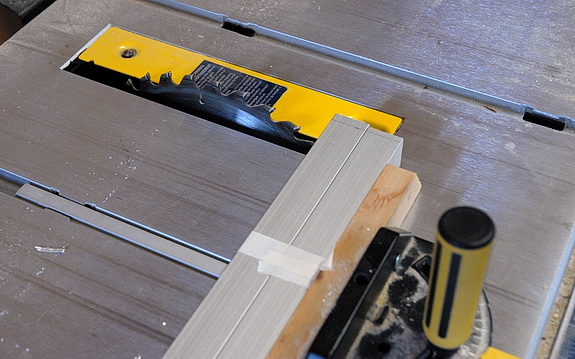
One way to get nice, accurate cuts in aluminum is with a table saw. I have taped the scopes trusses together so that they can be cut to the same length on a single pass through the saw.
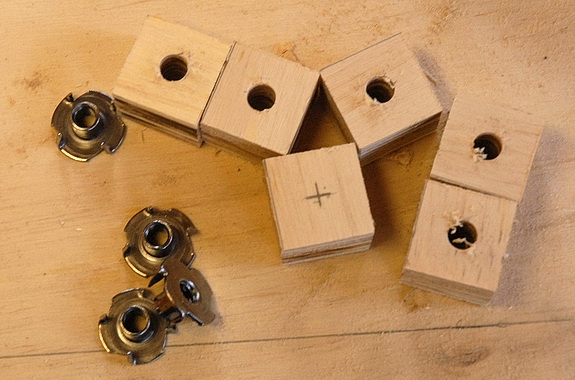
I wanted to be able to assemble the scope by running screws through the front and rear plywood pieces into the aluminum struts. To do that, I needed to install threads in the ends of the struts. I did this by making some cubes of ¾-inch plywood, into which I inserted ¼-20 T-nuts. I used J-B Weld to glue these assemblies in place inside the struts. It works like a charm. As you can see from the photo above, I made a couple of extra blocks just in case I messed up.
Minimalist Construction
I used ½-inch plywood for the main parts and ¾-inch for the side-bearing rings. A jigsaw proved to be very useful for cutting out as much excess wood as possible from the rocker box panels. Where possible, I tried to ensure that the remaining wood forms triangular elements for maximum rigidity. At the front end I tallied additional weight savings by reducing the original scope’s secondary cage to a single plywood ring with a plate to accommodate the focuser, and a pair of mounting blocks for the curved secondary vane. At the back end I dispensed with a mirror box altogether and simply attached the aluminum struts directly to the rear disk of the double-plate mirror cell. The front ring, rear mirror-cell plate, and side-bearings share the same 11-inch outside diameter, which meant I could save time by utilizing a single setting on my router’s circle-cutting jig. The secondary ring and side bearings also share the same 8¾-inch inside diameter.
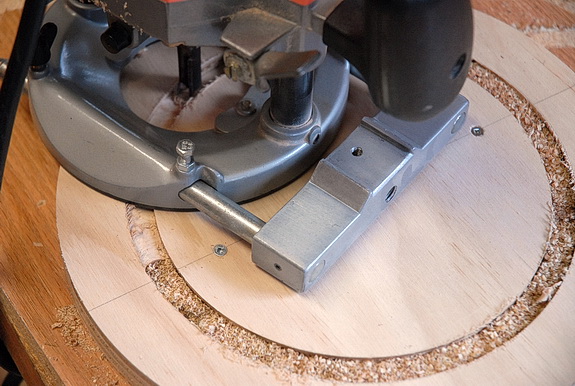
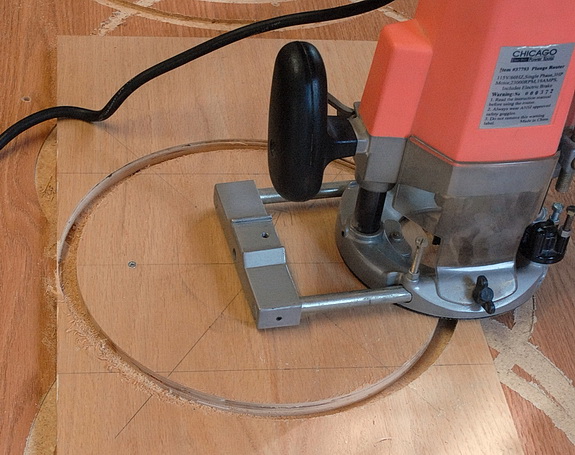
A router with a compass jig is the best tool for cutting the various circles my scope’s design requires. Remember to always secure your work piece to some scrap wood and to cut the outer circumference first. Here I’m finishing up one of the scope’s side bearings.
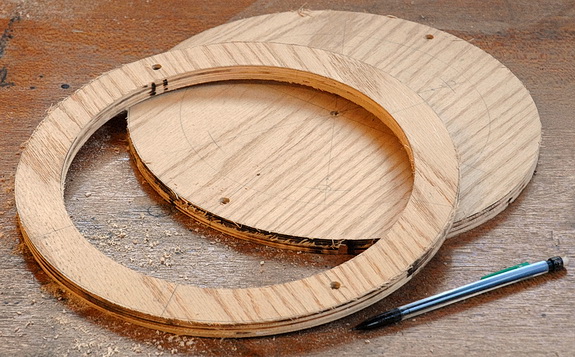
Shown above are the front secondary ring and the rear plate of the primary mirror cell. One of the keys to this scope’s design is that all circular parts have the same outside diameter. Naturally, it’s best to cut all these before resetting the router’s circle-cutting jig for other work.
To complete the tube assembly, I dispensed with the original scope’s four, ½-inch aluminum poles and replaced them with a pair of 29¼-inch long, 1-inch square tubes. Since fewer struts means less mounting hardware, the weight savings were multiplied. I glued sockets (consisting of ¼-20 T-nuts mounted in wooden cubes of ¾-inch plywood) into the ends of the square tubes, so that the front secondary-ring and rear, mirror cell could be affixed with socket-head cap screws. As a bonus, this two-strut arrangement is actually more rigid than the previous 4-pole configuration.
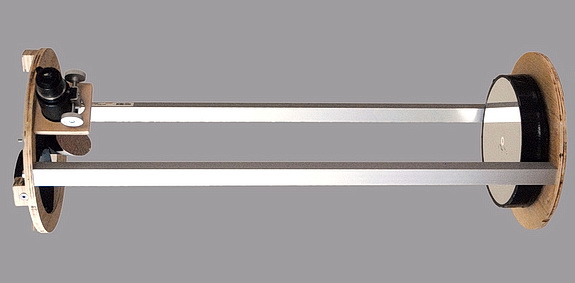
Here is the optical tube fully assembled. Now I can easily figure out where the scope’s centre of balance lies, which is crucial for figuring out the placement of the side bearings and determining the dimensions of the rocker box. I simple rested the scope on a pole and moved it laterally back and forth until I found the balance point, which I then marked with a pencil on one of the struts. Remember to put your favourite eyepiece in the focuser though for accurate balance.
When it came to the ground board, I decided to make two versions. The first is a simple table-top design that is basically a round disk of plywood with three Teflon pads on top and three feet underneath. The second is a more elaborate assembly that attaches to my Bogen camera tripod via the tripod’s center-column socket, as shown in the photo at the top of the page. The ground board for this configuration is similar to the one described in as part of my Easy-Go-Round binocular mount . The key to a stable support is to ensure that the scope’s mass is transferred directly to the tripod legs. Although the tripod is additional weight, it’s an item I always take with me for photography.
Back to the router. The best way to ensure that the curves in the rocker box sides come out identically is by routing a complete circle from a single piece of wood. Then, all you have to do is cut the piece in half, trim away the excess, and you have nicely matched rocker sides. Just be sure to draw all your cut lines first!
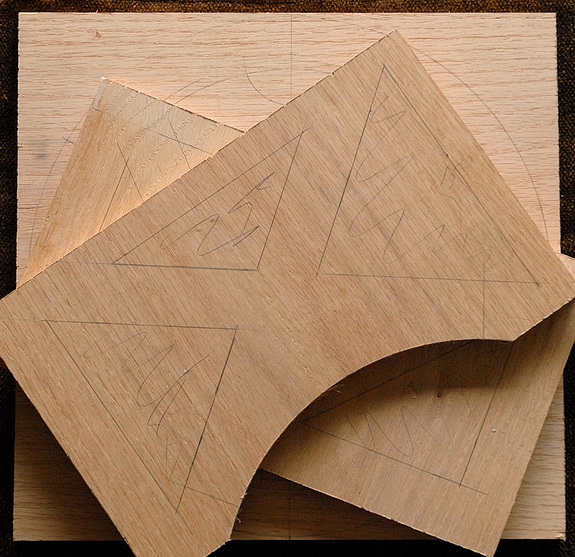
Here are all the rocker-box pieces. Pencil marks indicate where to cut wood away to reduce weight.
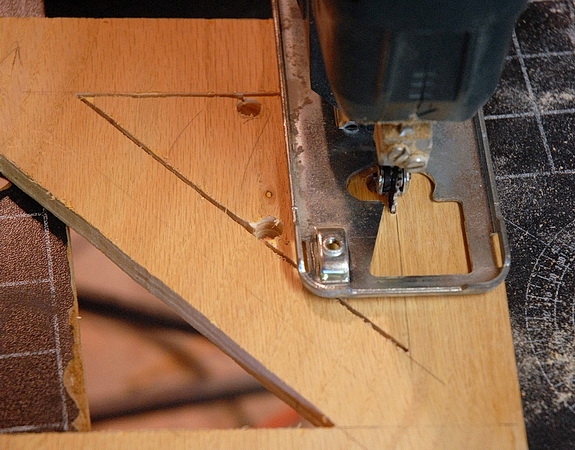
I used a jig saw for the rocker-box cut outs. Note the holes I drilled beforehand so that I could insert the jigsaw blade at the start of the cuts.

Here are the rocker-box parts before assembly. By trimming away the excess wood, I was able to cut its weight in half without significantly reducing rigidity.

The fully assembled rocker box, all ready for painting.

You can use any outdoor paint or stain for telescopes, but I like odour-free and easy-to-clean Verathane Diamond Wood Finish.
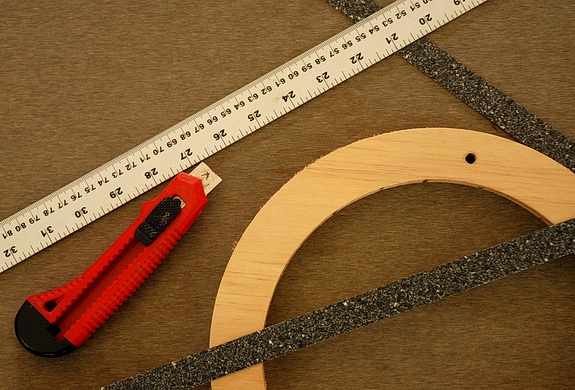
I used Ebony Star textured laminated for the side bearings and the underside of the rocker box. Cutting the strips for the side bearings is pretty easy. You can get neat results with the score-and-snap method by using a sharp utility knife guided by a yardstick.
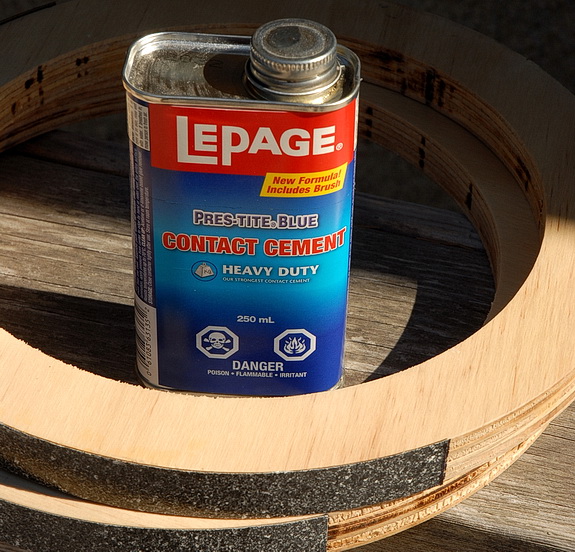
Contact cement is the best way to glue Formica to plywood.
Taking Flight
One aspect of this travelscope that isn’t apparent when it’s assembled is that the individual parts are dimensioned to fit together inside the rocker box, for safe transport. With the exception of the ground board, everything is secured via a pair of long bolts that pass through holes in all the parts and the bottom of the rocker box. Once I tighten down a pair of wing nuts, the individual components are locked down and ready to be packed into my suitcase.
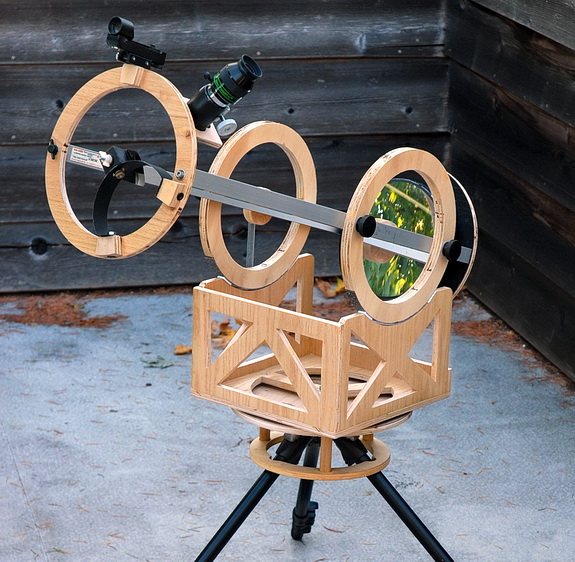
The completed scope ready for first light I’m pleased to say that the scope turned out better than I’d hoped. It’s not only more rigid than its previous incarnation, it is also 10 pounds lighter.
So how did my new travelscope perform on its maiden voyage? Beautifully. In the end I was able to trim 10 pounds off the original, resulting in a lightweight 15-pound package. The scope made it to Australia and back unharmed in a checked suitcase. And I’m pleased to say that when I arrived at my hotel, I was able to assemble the scope in my room in only 10 minutes. Best of all, I had an 8-inch scope with me in the outback to explore the wonders of the far-southern skies from a dark, desert location. All it took was an hour spent blissfully scanning the Large Magellanic Cloud to make the effort worthwhile.
Did you find this article interesting or helpful? If so, consider using this link the next time you shop at Amazon.com. Better yet, bookmark it for future use. Thanks to Amazon’s associates program, doing so costs you nothing yet helps keep this site up and running. Thanks!
(Note: This is an updated and expanded version of an article that originally appeared in the March 2013 issue of Sky&Telescope magazine.)