
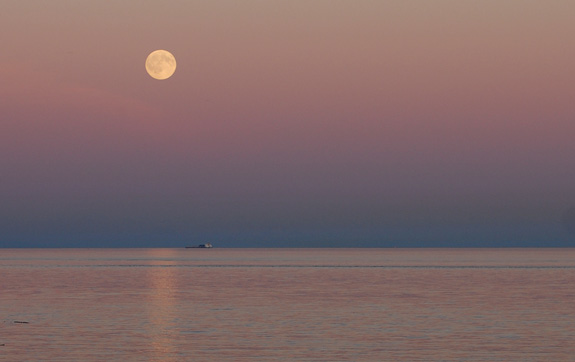
The Moon is unquestionably one of the most appealing sky sights. We’re drawn to it as though some primitive impulse from deep within rises to the surface whenever we see the lunar disk shining from the darkness, like consciousness itself. And it’s simply beautiful. No wonder it’s the subject of countless poems, the lead player in numerous nursery rhymes, and usually the very first target for a beginner’s telescope.
The Moon is also one of a handful of astronomical sights that can be enjoyed with just the eyes you were born with. You can follow its changing phases, watch lunar eclipses, and even identify its largest surface features, all without optics. But if you really want to see everything the Moon has to offer, some gear is necessary.
Binocular Vision
Ordinary binoculars may not be as powerful as even a small telescope, but they do have a few important pluses. Perhaps their biggest advantage is that you probably already own a pair. Another plus is that, compared with telescopes, they are easy to aim and use. Unlike telescopes, binoculars show the Moon with the same orientation it has in the sky — it’s not upside down or mirror reversed. This makes it easy to match the bino view with most Moon maps as well as what you see with your unaided eyes.
Typical binoculars magnify 7× to 10×, which is enough to show dozens of large craters and the most prominent mountain ranges. However, to see even minimal detail, it’s very important that your hold your binoculars steady either by bracing them against a railing, or better yet, by mounting them on a camera tripod or a support like the one described here. This will help eliminate image jiggles and make it much easier for you to see smaller features.
While I wouldn’t recommend buying binoculars just to look at the Moon, if you already have a pair, give them a try. You might be pleasantly surprised.
Starting Small
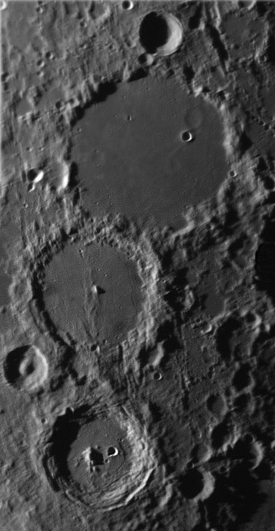
A good quality 3-inch telescope on a sturdy mount will show enough lunar detail to knock your socks off. Such an instrument, used in excellent viewing conditions, will reveal craters as small as 4 kilometers (2½ miles) in across. That means something like 800 named craters are within reach. Not bad for a piece of gear that can be carried into the backyard with one hand. Even a modest spotting scope, like those popular with birders, can show remarkable detail on the Moon.
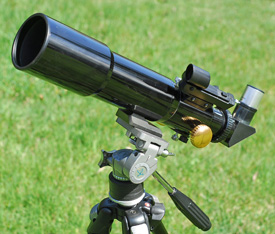
Convenience is something that shouldn’t be overlooked when it comes to choosing a telescope. No matter how much you enjoy looking at the Moon, there are going to be nights when you might not feel like setting up a big telescope. On such occasions a small scope comes in handy. I have a nice 66mm refractor on a camera tripod that I use for quick looks when I don’t have time for a long observing session. Remember: a small scope in the backyard always shows more than a big scope in the closet.
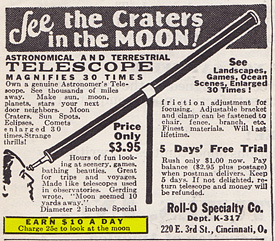
But a word of warning is in order here — lots and lots of small telescopes aren’t worth the time it takes to put them together. Such “trash scopes” always come in colourful boxes adorned with detailed pictures (taken by the Hubble Space Telescope) and feature claims of extravagantly high magnification followed by lots of exclamation marks.
If you’re new to the world of telescopes, take care to purchase yours from a reputable dealer that specializes in astronomical equpiment. If you just hop in the car and drive to your local Wally Market, you’re almost certain to end up with junk. It’s not that big box stores are evil (though, some might be), it’s just that they try to stock absolutely everything, and its simply not possible to have purchasing agents and staff who are expert at everything.
Mid-sized Marvels
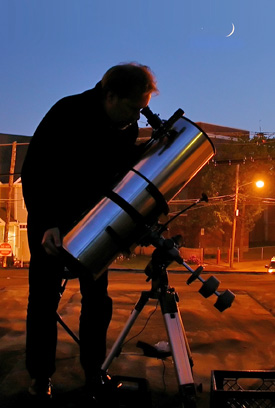
Most backyard stargazers use scopes in the 6- to 8-inch range, usually reflectors of one kind or another. For lots of observers, this size of instrument represents an ideal marriage between capability and convenience. The amount of fine lunar detail they show is astounding. All kinds of intriguing features that smaller scopes just hint at, snap vividly into focus. Indeed the view may be so good that you will wonder what’s left to be gained by using anything bigger. The answer is, not much. An 6-inch scope will resolve craters as small as 1½ km diameter — pretty tiny. An 8-inch will do even better. Since the Moon is plenty bright, a scope in this size gathers enough moonlight to take serious magnification without dimming the view. This class of telescope could keep a lunar observer busy a lifetime.
Playing With the Big Boys
Although I enjoy using my 6- and 8-inch scopes on the Moon, I have to confess that I do most of my moonwatching with a 12.75-inch reflector. This is a pretty big scope, but for me the improvement in the view is great enough to justify the additional effort involved in setting it up. A scope this size can show crater pits with diameters less than 1km when conditions are good. And I can more easily see intricate detail with this scope than with my 8-inch — so much so that the Moon’s entire surface seems almost textured. It’s true that you don’t need a scope this big to fully enjoy the Moon, but it’s nice to have if you’re a confirmed lunatic like me.
Some people find the view of the Moon in a large scope uncomfortably bright. I’m not one of them, but this is a pretty easy problem to solve. Increasing the magnification dims the image by spreading the light out over a larger area, and you can even buy filters to take down the glare (see below).
Is even bigger even better? Sure, though most owners of monster scopes seem to spend most of their time avoiding the Moon instead of looking at it. Yet one of the finest lunar views I ever had was with a friend’s 16-inch scope. He’d just finished making its mirror and temporarily installed it in a tube so we could try it out. We aimed at the Moon and were treated to an amazing sight. All kinds of intricate detail materialized in the eyepiece, as you would expect, but the view wasn’t eye-wateringly bright. Because the mirror hadn’t yet had its shiny aluminum coating applied, it produced an image that was only as bright as a 3¼-inch scope, but with the resolution of a 16 inch. It was quite unforgettable.
Fuzzy Seeing
Three factors determine how much lunar detail you’ll see with your telescope: the size of its main mirror or lens (its objective), the quality of its optics, and the seeing conditions. “Seeing” is the word astronomers use to describe the steadiness of the atmosphere. This is different from transparency, which is simply how clear it is. The air above us behaves like weak lens of extremely poor quality. It distorts light coming from the Moon before it even has a chance to enter your telescope. It’s what causes stars to twinkle. When the seeing is bad, the view will be watery and fuzzy and you’ll have difficulty discerning small features. Luckily, conditions vary from night to night and even from hour to hour, so the best way to beat the seeing is to observe often.
While it’s true that few locations have great seeing most of the time, it’s also true that few places have bad seeing all the time. You can improve your chances of good seeing by avoiding looking over heat sources, such as your neighbor’s roof, asphalt that has been baking all day in the Sun, and so on.
Another factor that can mess up your views is telescope thermals. This is another kind of seeing problem, one that arises as your telescope’s optics try to cool to the outside air temperature. The worst of the thermals usually calm down after half an hour or so, but the bigger your scope is, the longer it will take to cool. Storing your scope outside helps, but it’s not a complete solution. Controlling telescope thermals is a topic for another article, but suffice it to say, it’s the #1 reason most telescopes (especially reflectors) don’t deliver their very best.
Accessories and Niceties
When it comes to choosing eyepieces, many of the same feature that work for general viewing are desirable for lunar observing too. You want good quality optics, a range of magnifications, and a decent apparent field. But because the Moon is so bright, you might favour simple eyepieces that have fewer elements and are less prone to ghosting. Think old school. Plössls and orthoscopics are good choices especially if you’re on a tight budget. The downside to these designs is that you will be sacrificing eye relief and apparent field compared with other, modern eyepieces. That said, good quality anti-reflection coatings can make multi-element designs perform like lunar champs. Even the most sophisticated eyepieces can suppress ghost images effectively if they have good coatings.
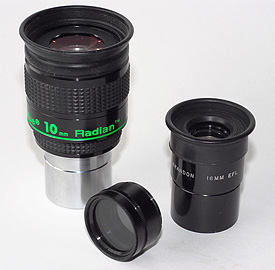
For my lunar viewing, I tend to favour the Tele Vue Radian line of eyepieces. They have good eye relief, excellent coatings, and sharp optics. The Radians also have a reasonably wide apparent field, which helps make the views more impressive.
If you’re one of those people who find the telescopic Moon uncomfortably bright, you can use a filter to dim the image. My favourite is a variable polarizing filter. Basically, it’s a pair of polarizing filters stacked together. By changing the orientation of one filter relative to the other, you change the amount of polarization and, therefore, the amount of light the filter lets through. Think of it as a dimmer control for your telescope.
Another useful accessory is a tracking mount or clock drive. Such a system will keep your telescope aimed at the Moon by counteracting the Earth’s rotation. This is especially desirable if you do a lot of high-magnification viewing. I personally don’t mind not having this feature — indeed most of my lunar observing is done with a non-tracking Dobsonian. But there’s certainly no denying it’s nice not having to move the scope every few seconds to keep a feature centered in the eyepiece.
The Moon Awaits!
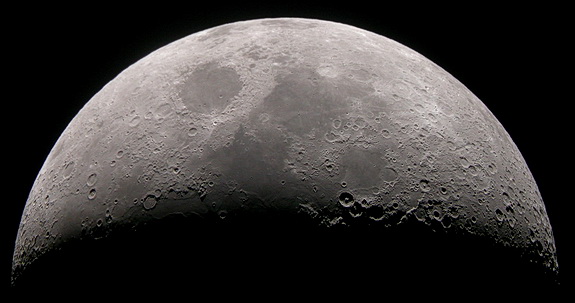
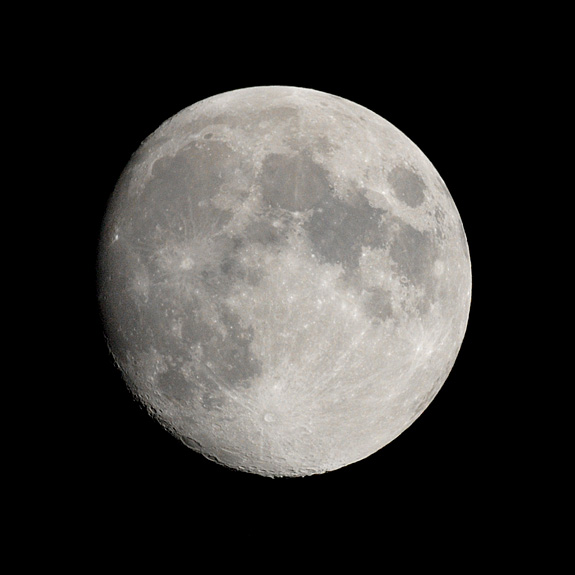
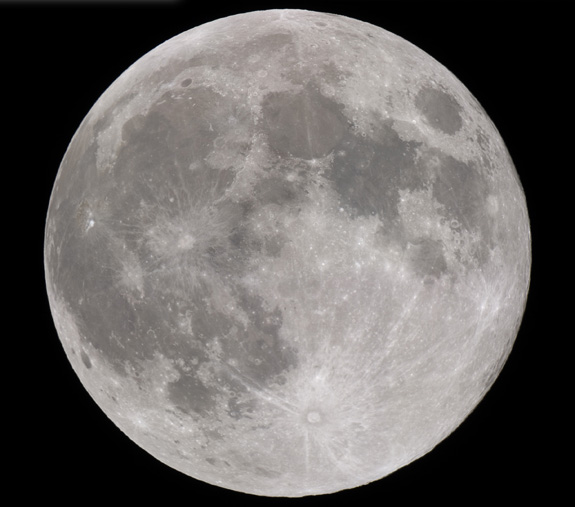
It’s perhaps ironic, but the very worst time to view the Moon is when it is full and at its most alluring. The trouble is that with the Sun shining directly down on the earth-facing side of the Moon, there are no shadows being cast and even big craters seem to fade away. Just about any other phase is better when it comes to teasing out fine detail — and that detail is found along the lunar terminator, the place on the Moon’s surface where night meets day.
Along the terminator you’ll find all kinds of features dramatically lit. Often you’ll see craters whose floors are pitch black while their rims form luminous rings, or mountain peaks looking like detached points of light floating in blackness. Indeed, many low-lying features can only be well seen when the terminator is near. And what’s exciting is that the appearance of these features can change noticeably in less than an hour! When you go out to your telescope for night of moonwatching, let the terminator guide your gaze.
The next time it’s clear and the Moon is up, get out your gear and embark on your own personal Moon voyage. Slip in an eyepiece that gives you around 200× and look around. Your telescope will show lunar features as if you were 200 times closer — like being in a spaceship less than 2,000 km from the Moon’s surface. No spacesuit required. And best of all, you’ll be home in time for bed.
Did you find this article interesting or helpful? If so, consider using this link the next time you shop at Amazon.com. Better yet, bookmark it for future use. Thanks to Amazon’s associates program, doing so costs you nothing yet helps keep this site up and running. Thanks!