
The Astroscan’s greatest strength is its bare-bones simplicity, which unfortunately also means it lacks adjustments for achieving optical alignment.
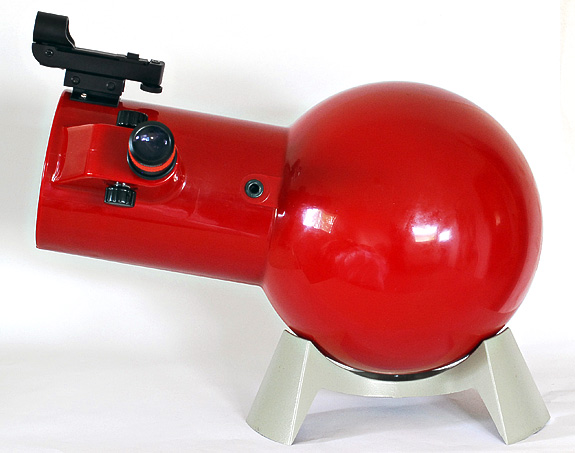
Edmund Scientific’s Astroscan has been around since 1976. Its enduring appeal is at least partly due to its no-muss-no-fuss simplicity. You plop it down in its base, put in an eyepiece, and you’re good to go. The optics come factory aligned, so you never have to worry about collimation. Unless, that is, the mirrors go out of alignment. And since the Astroscan doesn’t have adjustments to correct this malady, you’re stuck. But are you really?
For the brave (or, perhaps foolhardy), there is a procedure you can perform that will put the scope’s optics back into alignment. First, if you’re not comfortable handling optics and disassembling your Astroscan, go no further — this isn’t for you. Your best option is to send the scope back to the factory. Even if it’s beyond its warranty period, Edmund will recollimate your Astroscan for a very reasonable fee. For most everyone who reads this article, returning the scope to Edmund is the best option. However, if you’re a natural born tinkerer, or just curious to know what’s involved, read on.
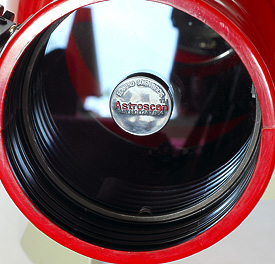
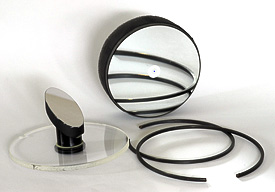
The Astroscan mainly relies on the accuracy of its plastic housing for optical alignment. A pad of foam rubber pushes against the rear of the primary mirror and forces it against a retaining ring, which is captured by plastic fingers that are part of the scope’s shell. The secondary mirror is glued to a short tube, which is in turn glued to the optical window. If everything is manufactured to specification, the collimation should be pretty good.
However, things are never exactly perfect, so some fine-tuning of the optical alignment is unavoidable. In the Astroscan that fine tuning is accomplished by adjusting the tilt of the front window by very small amounts, which in turn, adjusts the aim of the secondary mirror and allows for enough adjustment to achieve conditional alignment, that is, alignment that is correct for one focuser position, and nearly perfect for the rest of the focusing range.
There are two main reasons for an Astroscan to be out of collimation. First, it may have left the factory that way. I’ve seen a few brand new units that were close, but not well enough aligned for high-power work. If yours is under warranty, clearly the first, best option is to have Edmund take care of it. The second cause of miscollimation is ageing of the foam cushion that the primary mirror sits on. When it no longer exerts enough force to push the primary mirror against its retaining ring, collimation usually goes out.
To recollimate your Astroscan, you’ll need to round up a few items. You’ll need a pair of cotton gloves, some double-sided foam tape, a collimation eyepiece, and (possibly) some sponge rubber. In addition you’ll need to make or buy some kind of tool for removing the optical window’s retaining ring, like this one listed at Amazon.com.
Here’s the procedure:
1. First remove the retaining ring that holds the optical window in place. There are two small holes at the ends of the ring which you use to engage your tool and squeeze the ends of the ring together. The spring isn’t terribly strong, so not a lot of force is needed to remove it.
2. Using double-sided tape, attach an old film canister (or similar) to the plastic disk on the front of the Astroscan’s optical window.
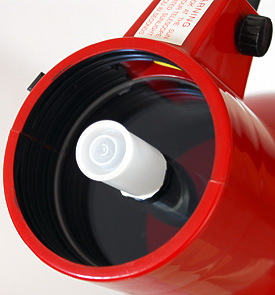
3. Aim the scope straight up and remove the window by pulling on the film canister — the window should lift straight out. If it’s tight in the scope housing, remove the focuser draw tube by racking it all the way out, reach inside with a gloved finger, and push on the back surface of the window to dislodge it. Set aside.
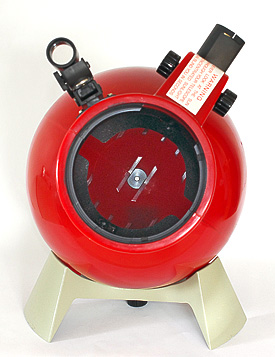
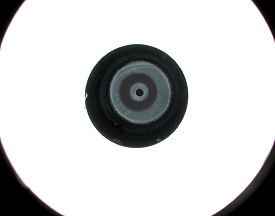
4. Next is the scary part — removing the primary mirror. This step is necessary if you need to replace the scope’s foam cushion and to centre-dot the primary. With your gloved hand, reach in the front of the scope and carefully unclip the primary mirror retaining ring by squeezing it so that the ends come together and the ring pops out from under the plastic retaining fingers. You have to do this by feel since you can’t actually look down the tube at the same time.
5. Once the retaining ring is removed, the primary should just lift out.
6. Centre-dot the primary and, if necessary, replace the foam cushion. Replace the primary and reinstall the retaining ring. This will require you to accomplish the challenging task of squeezing the ring together while simultaneously pushing the primary mirror back a bit. It may take several nerve-wracking tries, but eventually the ring will snap back into place and secure the mirror. The trick is to do this without letting the ring scratch the mirror’s delicate reflective coating. Take your time and everything should go fine.
7. Reinstall the front window/secondary mirror assembly — note that a notch in the window has to align with a bump in the scope housing, situated opposite the focuser. This arrangement ensures that the window (and secondary) are rotationally correct with respect to the focuser. Don’t reinstall the retaining ring just yet.
8. Now, with focuser draw tube racked to where it sits with your most frequently used eyepiece (usually about half way in its travel), pop in your collimating plug and assess the situation. You’re now ready to collimate.
9. Collimation is accomplished by changing the tilt of the optical window with shims. If you look closely, you’ll probably see one or two shims already in place in the housing where the window seats. Your task is to find out where and how much additional shimming will improve alignment. This is purely trial and error and, yes, it can be tedious since each time you put a new shim in place you have to put the window back to check your results. (That’s where having the film-canister handle comes in handy.) One way to see what’s going on is to remove the focuser draw tube, push the window up just a little from the inside, and then replace the draw tube and see what affect that action had. This should help you determine where the shims need to go.
10. To shim the optical window, use tweezers to place small (roughly ⅛-inch by ¼-inch) strips of electrical tape on the rim where the window seats. You’ll likely need to add shims in two locations, separated by 120°, but add a single shim to the 3rd location to ensure that the window is supported by three equidistant pads. This will prevent the window from rocking unpredictably.
11. Add shims by stacking the tapes strips until you get the thickness necessary to achieve the tilt required to collimate the scope. For example, the Astroscan I currently have required 5 layers of tape in one position, and 3 in another. This method allows for surprisingly precise alignment.
12. Once you’re satisfied with your collimation efforts, re-install the retaining ring and confirm that nothing has shifted and your alignment is still good. If the window doesn’t seat properly (usually because the notch and tab aren’t lined up correctly), your collimation will be way off — remove the window and re-seat it.
That’s it — you’re done. The good thing about this collimation setup is that it’s remarkably robust once it’s set correctly. I’ve found that the Astroscan can take a lot of jostling and abuse and still retain optical alignment. That goes a long ways towards making up for the fact that the collimation procedure is such a nerve-wracking experience!
Did you find this article interesting or helpful? If so, consider using this link the next time you shop at Amazon.com. Better yet, bookmark it for future use. Thanks to Amazon’s associates program, doing so costs you nothing yet helps keep this site up and running. Thanks!