
For optimum performance, precisely aligned optics are a must. Luckily, achieving this goal doesn’t have to be difficult.
Most telescope users know that the only way to get every last drop of performance from a reflector telescope is to ensure that the optics are in good collimation. Here’s a method that’s simple and doesn’t require tools or even a centre-dotted primary mirror.
Most of the time when we need to align the optics in our scope, we reach for devices such as a Cheshire eyepiece or laser collimator. But in spite of their utility and usefulness, tools like these do have their shortcomings. For instance, most collimation devices depend on the centre of the primary mirror being marked in some way. That’s fine for Newtonian reflectors, but not for SCTs and Maks. In addition collimation accuracy, depends to some extent on how precisely the tools were made, and how carefully the centre mark was positioned. And of course, tools cost money. Luckily, there’s a way of achieving optical alignment that bypasses these considerations.
The method outlined here is essentially a star test, but with a twist. It can be performed in the dark and requires no tools — only a clear night sky. Here’s how to proceed:
1. Select a star that’s around 2nd magnitude, and centre it in your scope. For Dobsonian users, Polaris is the ideal choice — it’s the right brightness and essentially stationary. Of course, if your scope has a tracking mount, you have more options. Next, choose an eyepiece that provides the right amount of magnification. How much is “right?” The ideal power is around 25× per inch of aperture, which is what Dick Suiter recommends in his classic book, Star Testing Astronomical Telescopes (Willmann-Bell). So, for an 8-inch scope, you want to be operating around 200×. A simple, math-free way to get 25× per inch is to choose an eyepiece with a focal length that matches the f/ratio of your scope. For example, if your scope is f/6, use a 6mm eyepiece. If it’s f/10, a 10mm eyepiece will get you about 25× per inch. Easy.
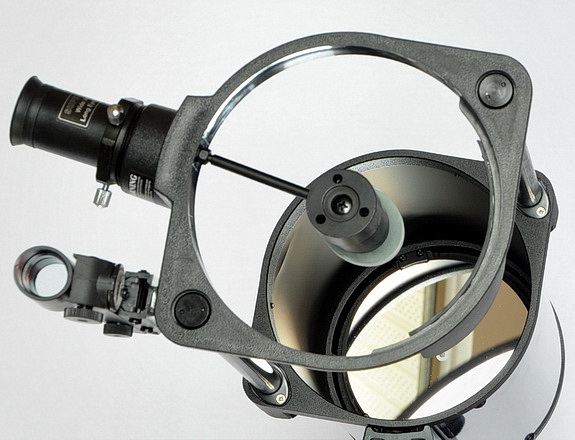
2. Adjust the focus (in or out, it doesn’t matter) until the star is no longer a sharp point, but rather, a disk of light with dark hole (the secondary mirror’s silhouette) near its centre. If your scope is out of collimation, that hole will not be exactly in the middle, indicating that the primary mirror’s zone of sharpest imagery isn’t centred in the eyepiece. Your task is to locate that zone of sharpness, and shift it to the centre of the eyepiece’s field of view.

3. Move the out-of-focus star around the field of view by re-aiming the scope until you find the location where the black hole in the star image is centred, or most nearly so. That’s the sweet spot. Your task is to move the defocused star from there to the centre of the eyepiece field by using your scope’s collimation screws.
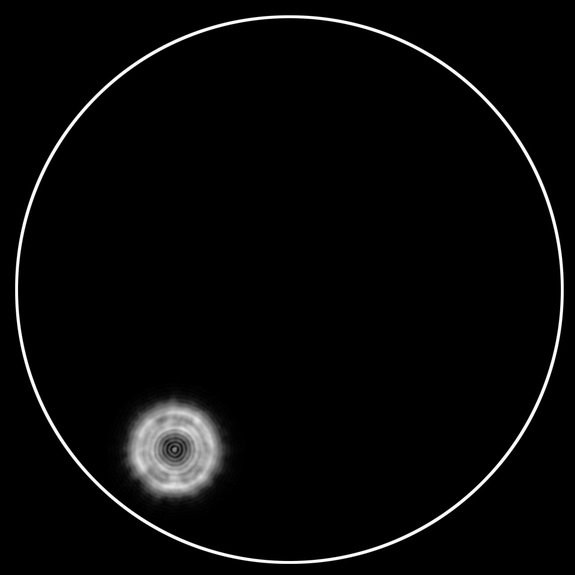
If you’re working with a Newtonian reflector, it helps to have someone else make the adjustments while you watch and give instructions. If you’re collimating a SCT, you can probably do the necessary adjustments to the secondary mirror yourself. Proceed slowly and methodically. Remember — if your scope has three adjustment screws, it should be possible to collimate it using only two of them, which makes the task somewhat simpler.
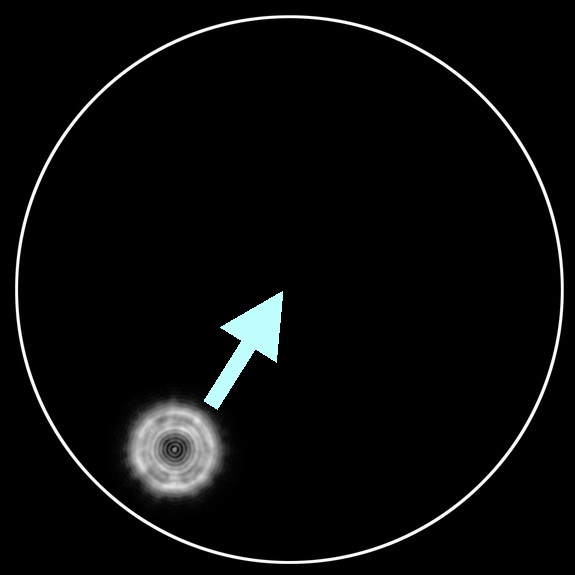
4. Once you’ve moved the defocused star to the centre of the eyepiece field of view, adjust the scope’s focus to shrink the star image down into a smaller circle of light. This step ups the sensitivity. Repeat the previous step, then focus down tighter still, and repeat again. After one or two iterations, you will be looking at a star image that’s just slightly out of focus, which is where this method is most accurate.
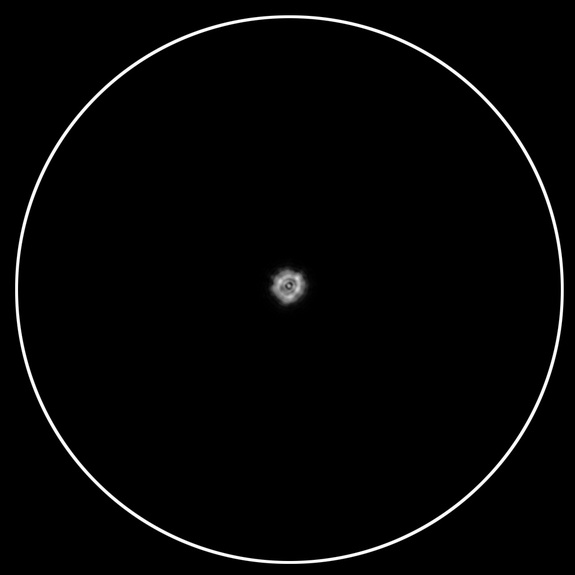
5. When you’re think you’re done, centre the star, defocus it, then slowly refocus while paying close attention to the dark hole at the centre of the star image. If your scope is well collimated, the bright rings in the defocused star image will collapse down concentrically around the shrinking black centre.
This method works very well, but there are a couple of provisos. First, if you’re collimating a Newtonian, you have to make sure your secondary mirror is already correctly positioned. (See this article for the procedure.) Second, collimation accuracy depends on the seeing conditions. But since the seeing also limits the quality of the telescopic views anyway, this is a saw-off. Finally, the star-test collimation method works best for a quick touch-up in the field after the scope has already been roughly aligned — but most of the time that’s all the collimation that’s needed.
Give the no-tools method a try. I’m confident that with a little practice, it’ll take you only a few moments to fine-tune your scope’s optical alignment in the field.
Did you find this article interesting or helpful? If so, consider using this link the next time you shop at Amazon.com. Better yet, bookmark it for future use. Thanks to Amazon’s associates program, doing so costs you nothing yet helps keep this site up and running. Thanks!
Note: This is an updated and expanded version of an article that appeared in the October 2013 issue of Sky&Telescope magazine.