
Day 15: Side Bearings
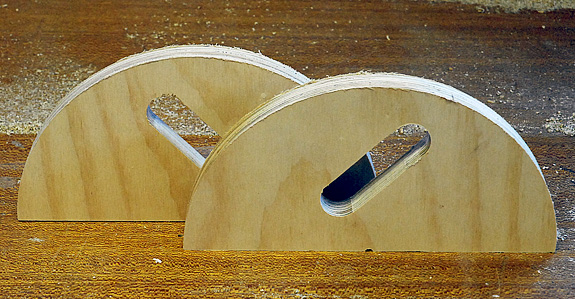
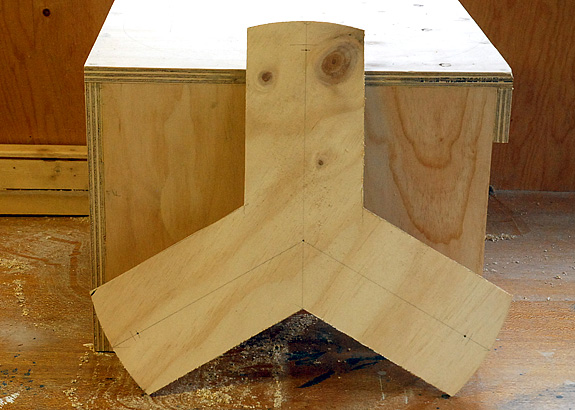
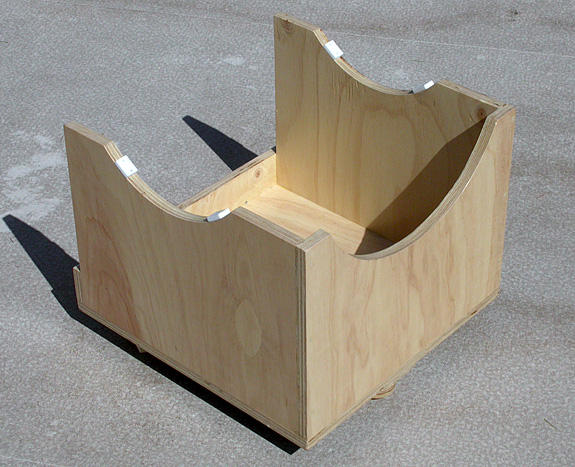
A finished pair of side bearings. The slots will serve as simple handles once attached to the mirror box.
Sometimes what seems like it should be a quick and easy operation, turns out to be unexpectedly complex. Making the side bearings from my scope was one such a case.
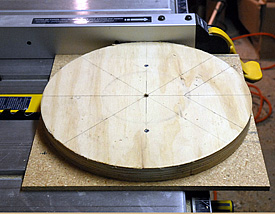
The disk of plywood is attached to a piece of scrap particle board.
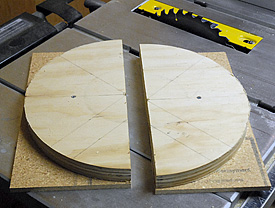
And after a trip through the table saw.
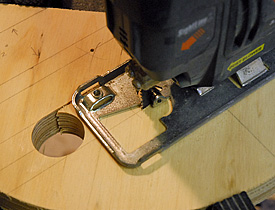
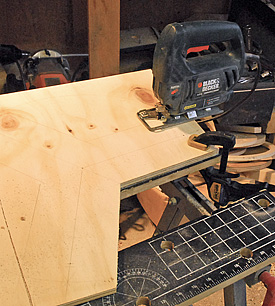
Cutting a hand hold with the jigsaw.
My plan was to make the pair of side bearings from a single 12-inch-diameter disk of 1-inch thick plywood. Problem #1 was that my usual source for plywood didn’t stock that thickness. No worries — I just bought some ½-inch instead. I cut two 13-by-13-inch squares, smeared lots of wood glue on one side, clamped the squares together, and let them sit a couple of days. Although it doesn’t really matter to me, the resulting piece is actually 1/16-inch shy of 1-inch thick. It turns out, like so many wood dimensions, that ½-inch plywood isn’t really ½-inch thick.
Cutting the actual circle with the router was no problem, but I had to remember to mark up the piece completely before this step. Why? Once I’d drilled the ¼-inch hole for the router’s circle-cutting jig, I effectively lost the precise centre of the piece. That makes it tougher, for example, to draw the cut line right through the middle. I also wanted to mark in pencil where the side bearings meet the top of the rocker box so that when I want to attach them later, I don’t have to do a lot of measuring to get the position right.
Once the circle was cut, I encountered problem #2. How do I cut it exactly in half? My first impulse was to do what I’d done with other scopes — get the jigsaw out and cut the disk freehand. But I thought that it would be faster and more accurate to use the table saw instead. But how to prevent the disk from rotating as I fed it into the blade? The solution was to screw the disk to a scrap square of particle board I had lying around. This way, I could push the disk through the table saw like any other piece.
The last step was to cut some hand-holds into the side bearings. This would make lifting the relatively heavy mirror box in and out of the rocker box easier. I like this idea better than adding store-bought handles later. For storage and transport considerations, it’s best not to increase the overall width of the mirror box if I don’t need to. In each side bearing, I simply drilled a pair of 1¼-inch holes with a Forstner bit, and then used my jigsaw to cut out the wood between.
Day 16: The Ground Board
The scope’s ground board is cut from ½-inch plywood.
The last major piece of my telescope-rebuild puzzle is the rocker box’s ground board. This component performs a simple, yet crucial function.
Unlike the other wood parts in this project, there was no need to use ¾-inch thick plywood. Indeed, even ½-inch is overkill. Mind you, this is only true if you follow an important rule of Dobsonian construction: the Teflon pads should be positioned directly above the ground board’s feet. If you do that, you can be sure that the mass of the telescope is transferred directly through the Teflon pads to the ground.
Cutting the ground board with a jigsaw.
A second rule (really more a guideline than a rule) is that you want to maximize the distance between the feet so that your scope is stable and resists tipping over. If you follow rule #1 though, your ground board can be no larger that the base of your rocker box. That’s big enough in most cases though.
I cut my tri-lobed ground board entirely freehand with my trusty jigsaw. All I had to do was draw its outline on a piece of plywood, and then cut. Easy. And since no one is ever going to see it, I didn’t even have to worry if a couple of the cuts weren’t perfect.
Just like that, major construction operations have concluded. The scope might look like it’s nearly finished, but I’ve built enough Dobs to know that I’m probably only half done. Sanding, finishing, and final assembly can soak up a surprising amount of time!
Day 17: Flat Blacking
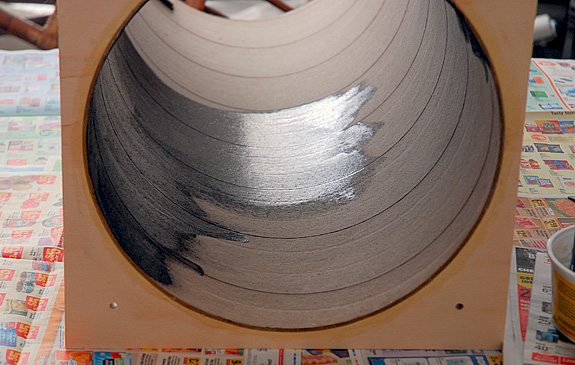
The flat black paint on the inside of the scope’s tube has its still-wet sheen. Once dry, however, the cardboard tube will be protected from the elements and reasonably dark.
After every void and screw hole had been filled and the whole works sanded, it was at last time to get painting. First up: flat black for the insides of the tube and the mirror box.
The paint I’m using for this operation is Rust-Oleum Painter’s Touch flat black. It’s an indoor/outdoor latex paint, which means the brushes clean up with a water rinse and there’s very little smell. I like that.
This is not the flattest black paint I’ve used — that distinction goes to Krylon’s Ultra-flat black paint. Unfortunately the Krylon only comes in a spray can and the fumes are really nasty. I opted for the Rust-Oleum because over the years I’ve become less fanatical about making sure that the insides of my scopes are dead black. Why? Simply because, with the exception of a couple of key areas, it really doesn’t make a perceptible difference. Indeed, at the risk of being accused of blasphemy, I’d say that one could leave most of the inside of the scope unpainted and it wouldn’t matter.
Without getting into all the details of effective baffling (that’s a whole other article), you do want to be sure that two locations are dead black: the area of tubing directly opposite the focuser, and the bottom of the mirror box. These are the only parts of the tube that can be “seen” from the perspective of the focal plane, which is why they matter.
Day 18: Wood Finishing
A durable finish is crucial to the telescope’s longevity and weather resistance.
Instead of painting this scope a solid colour, I opted for a natural wood finish. This is the part of the project that I approached with the greatest trepidation since I have a gift for making paints and stains run. Still, there’s no avoiding having to coat the wood parts with something to protect the telescope from the elements.
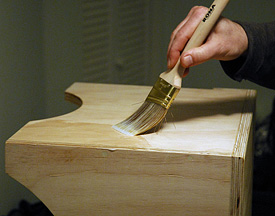
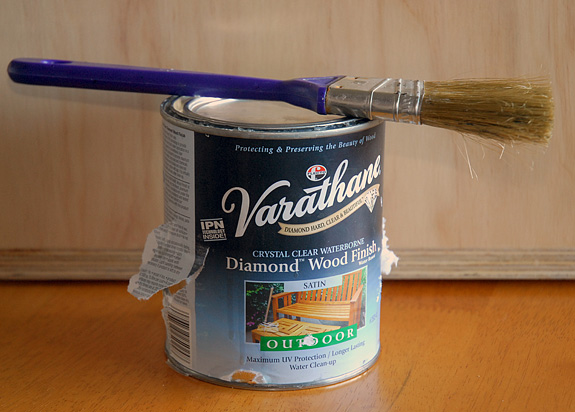
Applying clear Varathane to the rocker box.
Since I don’t like fumes and nasty smells, I opted for Varathane Diamond Wood Finish, which is a water-based product. It goes on looking like watery milk, but dries to a clear satin finish and gives the wood a nice, subtle golden hue. The brushes clean up nicely with just tap water, and it really is so much more pleasant not to have to use (and, later, dispose of) noxious thinners or turpentine.
I applied five coats to all bare wood surfaces, lightly sanding between applications. That many coats might seem like overkill (and perhaps it is), but I know that some morning on Mt. Kobau, I’m going to be using the scope when it’s white with frozen dew, and I’ll be glad I made the extra effort. I also expect that most of the time this scope will live outdoors so it can be used at a moment’s notice. That being the case, there’s really no such thing as overprotecting the wood.
As usual, I have to admit that I didn’t get results as nice as I’d hoped. For one thing, the grade of plywood I used just was too rough for a really nice finish. But the main problem was that I applied the Varathane too liberally and managed to produce some runs. I tend to worry a lot about choosing the ideal varnish, the best brushes, and making sure all the prep is done, but at the end of the day the result I get depend on how impatient I am more than anything else. If I’d taking greater care I could have avoided those runs. Oh well. As I always say, perfection will have to wait for the next scope.
Day 19: Ebony Starring
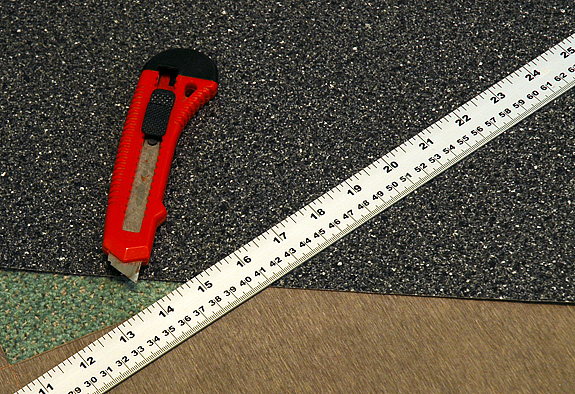
The tools of the laminate-cutting trade: a utility knife and an aluminum yardstick.
Teflon bearing on Ebony Star laminate is what gives a well-made Dobsonian telescope its legendary buttery feel and smooth, easily controlled motions. But as I found out, procuring Ebony Star can be more work than actually using it.
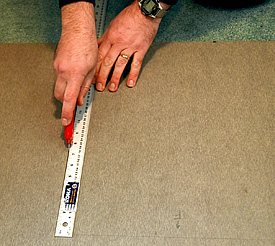
Cutting the Ebony Star piece for the rocker box.
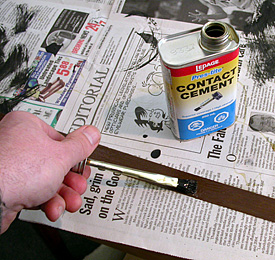
Applying contact cement to one of the two Ebony Star strips used for the side bearings.
I’d heard rumours that the pebbly surfaced Wilsonart Ebony Star that ATMs have used for years was no longer being made. Still, I did manage to find a local supplier who could order it in — which they did. Unfortunately, though it looked like the right stuff, its surface was smooth. What I wanted was Ebony Star 4552-50, not 4552-90 or dash anything-other-than 50. Lesson learned. Eventually I did track down a supply of the correct variety here in town, but it appears that the material will only become harder to get a hold of as whatever stock remaining in the supply chain gets used up.
Once I had my Ebony Star in hand, the rest was pretty easy. For this scope, I needed three pieces: one for the ground board, and two strips for the side bearings. I cut the pieces with a normal utility knife, laying the laminate on a piece of carpeting. The keys to success are cutting with multiple passes guided with a metal ruler, instead of trying to slice all the way through in two or three goes. The second key is to attack the back side of the laminate — don’t try to cut from the brittle, patterned side.
Attaching the Ebony Star to the plywood means using contact cement. It’s smelly and a bit messy to apply, but it works great. It’s important to test fit everything before painting the glue on the mating surfaces — once the glue-to-glue bond is made, it’s permanent. I used pieces of masking tape on the side-bearing strips to ensure that when I attached the laminate strips, they were correctly positioned on the wooden parts. Once the pieces are positioned, apply as much pressure to the parts as you can to ensure a permanent bond.
The last step in the process is to trim whatever laminate is overhanging the edges of the plywood. I simply used the utility knife to scrape the excess off with, holding the blade perpendicular to the edge.
Day 20: Rocker Completion
The rocker box awaits a telescope.
With the major work all done, my telescope rebuild project is entering the home stretch. All that remains is a long list of little tasks. Working from the ground up, I tackled the rocker box first.
To finish off the rocker box I still had to add the feet to the ground board, attach the Teflon pads, and install the central pivot bolt.
A metal carpet glide sits under each plywood foot.
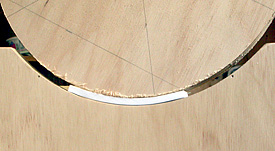
Curving the length of Teflon that will be cut into four pieces for the side bearings.
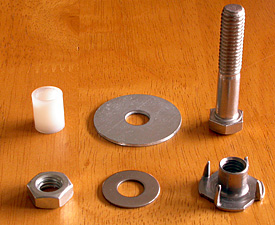
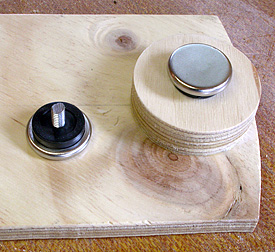
The centre bolt assembly consists of the six parts shown here.
I’d purchased a set of nice, chrome furniture glides that have ¼-20 threaded studs. I simply screwed these into holes in the round, wood feet previously mated to the underside of the ground board. The furniture glides look good, and seem to be very durable.
The next item on my list was the Teflon pads. Three round 1½-inch diameter pieces are used on the ground board. I cut these with a hole saw and got nice results, though a lot of heat was generated in the process. An arch punch
also works nicely. The pads were tacked in place directly above the feet on the ground board — a position that ensures the mass of the scope is transferred directly to the ground. I used small finishing nails for the task, ensuring that the nail heads were inset at least 1/16-inch below the surface of the Teflon — you really don’t want the nail heads bearing into the Ebony Star!
The Teflon pads for the side bearings needed to be modified slightly to conform to the arcs in the sides of the rocker box. First, I cut a ¾-inch wide, 4-inch long strip of Teflon on the table saw. Next, I used a heat gun to warm the Teflon strip until it was flexible, then I bent it to shape by pressing it against the rocker-box curve, as shown in the picture at right. Once the curved Teflon had cooled, I cut four 1-inch-long pads from the strip and tacked these into position with finishing nails.
Finally, it was time to attach the centre pivot bolt. This is slightly more complicated than simply running a bolt through the rocker box into a nut under the ground board — you want to ensure that the pivot assembly doesn’t unscrew or tighten as you move the scope in azimuth. The picture at right shows the parts. A 3/8-inch bolt passes through a fender washer and a nylon bushing before threading into a T-nut, which is affixed to the top side of the ground board. I screwed the bolt into the T-nut until it was finger tight, the backed it off until the fender washer could spin freely. Once that was done, I threaded the nut and washer onto the underside of the ground board, nice and tight. Assembled this way, the pivot bolt is captured by the T-nut and underside nut, yet the rocker box is free to turn, riding only on the Teflon-Formica bearings.
Day 21: Mirror Box. Done.
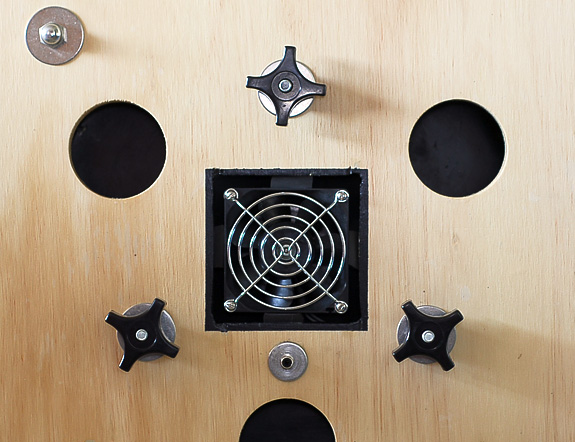
The mirror box as seen from behind. The three large knobs are for collimation, while the large acorn nut is part of the mirror-sling assembly.
The mirror box itself is, well, just a box. It’s the goodies that go inside and get attached to it that make it a telescope component. On today’s work list are: mounting a cooling fan, attaching the sling, and installing the mirror cell. And after that, in goes the primary mirror.
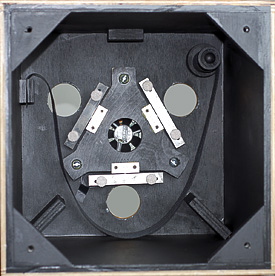
The interior of the mirror box, complete with mirror cell, support sling, and fan.
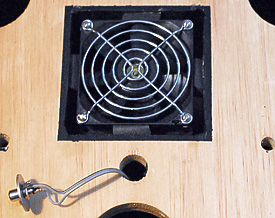
The scope’s cooling fan and RCA socket power connector.
One of the advantages of this project being a rebuild is that some components can be reused. The 6-point mirror cell from my travelscope will do double duty in this instrument. However, I had to come up with a new sling system. In the rebuild scope, this consists of a length of seatbelt material (from a local outdoor/camping supply store). This is the ideal material because, unlike many other types, seatbelt strapping doesn’t stretch when it gets damp. One end of the sling is anchored to the inside of the mirror box, while the other winds onto what amounts to a large knob with a carriage bolt that passes through it to an acorn nut on the outside of the mirror box. This knob allows me to adjust the tension of the sling. Once set, the knob is locked into place by tightening the acorn nut. In addition, two blocks on the bottom of the mirror box at 45° angles prevent the mirror from moving too far from side to side.
Anyone who has read my two-part article on telescope thermals would have guessed that this scope was going to have a cooling fan. The fan is wired to a jack, which is attached to a washer that is glued to the mirror box. When I want to run the fan, I simply plug the jack into a 12-volt battery pack. To dampen vibrations, the fan is mated to the mirror box with four blocks of foam rubber glued to the mirror box. The fan is not permanently affixed — it’s simply captured by the rubber blocks, which I sized to hold the fan securely.
With the fan and sling installed, all that was left was to carefully lower the primary mirror into the box. The scope is finally ready for final assembly and first light!
Jump to Week #4
Did you find this article interesting or helpful? If so, consider using this link the next time you shop at Amazon.com. Better yet, bookmark it for future use. Thanks to Amazon’s associates program, doing so costs you nothing yet helps keep this site up and running. Thanks!