
Day 22: Completing the Upper Tube
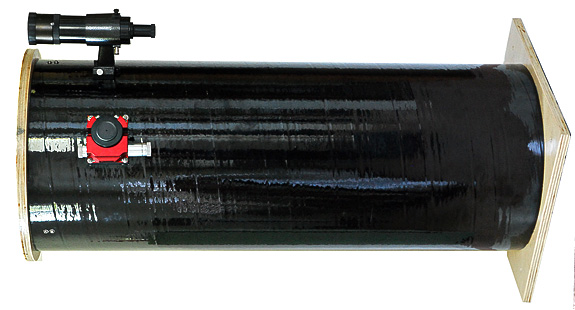
The scope’s upper tube all done. The gloss-black finish is achieved with Monokote.
With the mirror box done, it was time to move on to the comparatively straight forward job of finishing up the top half of the scope. This consisted of two tasks: giving the cardboard tube a protective covering and attaching all the hardware.
As I wrote in my Telescope Workshop column the June 2010 issue of Sky&Telescope, I don’t have great luck painting tubes. So, I prefer to use Monokote — a tough, durable, and attractive plastic covering normally used for model airplanes. (You can see the full array of colours and styles by visiting Monokote.com and can even purchase the stuff on-line at Amazon.com.)
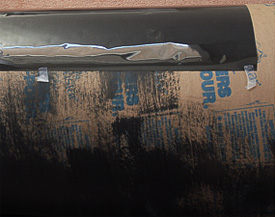
The Monokote temporarily taped in place.
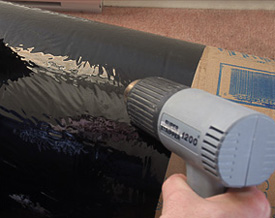
Applying heat to the Monokote.
The procedure for using Monokote is detailed in my S&T piece, but essentially there are three steps. First I cut the Monokote pieces to size and lay them on the tube, tacking each section in place with tape. Next I remove the tape as I apply heat to the overlapping seams with a heat gun (I used a paint stripper). Finally, I go over the entire surface with the heat gun until the Monokote shrinks to conform skin-tight to the tube.
You can see from the pictures why I like the Monokote — it’s a high-gloss, run-free finish. I’ve used it on many scope tubes over the years and have found it to be very durable. And if it should ever get a tear in it, it’s easy to patch just by laying a small piece over the tear and applying heat.
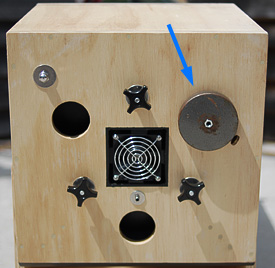
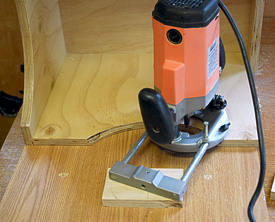
With the Monokoting done, all that remained to do was attach the finder, spider, and focuser. As usual this necessitated a trip to the hardware store to get the required nuts and bolts. I always use stainless steel fasteners on my telescopes. Yes, they cost a little extra, but since this scope is meant to last a lifetime and will likely see a lot of dewy nights, it seems silly to cheap out and use parts that will eventually rust.
As usual, some screws weren’t the exact length I needed and protruded too far inside the tube. I shortened these by clamping them in a vice, and using a hacksaw to cut them down to size. One tip: it helps to thread a nut on the screw before cutting off the excess. The hacksaw tends to mess up the last thread or two, but when you unscrew the the nut afterwards, it does a good job of repairing the damage.
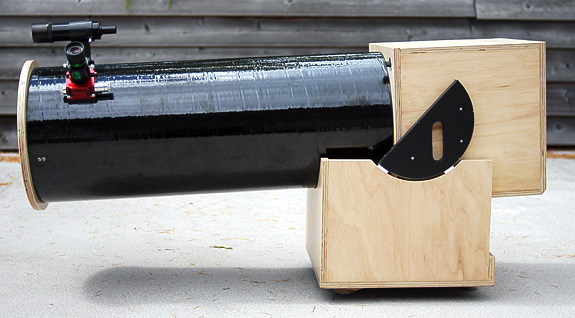
First light awaits!
Day 23: Things Go Wrong
Nose dive! The last thing I wanted to see when I finally finished assembling the scope.
Somewhere, in all the calculations and measurements, I screwed up. As soon as I had the telescope fully assembled for the first time, I discovered that it was seriously front heavy. Re-checking the balance point, it appears that the side bearings ended up being positioned nearly ¾ inch too far towards the rear of the scope. That might not sound like much, but it’s enough that the telescope will start a slow nosedive when I use a heavy eyepiece.
There are several ways to fix this, but none of them is terribly attractive. Conceivably, I could simply make do with lightweight eyepieces and forgo the use of the Paracorr. Or, I could use a smaller/lighter finderscope. But I want this to be my no-compromise scope. I want to be able to use the Paracorr and my nice 8×50 finder.
The obvious thing to do would be to simply move the side bearings up the tube the required amount. Unfortunately, doing so would mean that the back of the mirror box would bottom out on the inside of the rocker box. I would have to rebuild the rocker box, which obviously isn’t a good first choice.
Another potential solution is to increase the size of the side bearings by ¾ inch, and move them up the tube by the same amount. The advantage of going this route is that the rocker box would only need to be slightly modified. However, that modification, wouldn’t be straight forward. I would have to increase the size of the arcs cut into the sides of the rocker box to match the new side-bearing diameter.
The arrow points to a (temporary) solution: a 2.8-pound counterweight.
The option that requires the smallest amount of re-building is to bolt some kind of counterweight to the back of the scope. That’s easy enough to do, but it also strikes me as inelegant. Yes, I know that probably sounds a bit irrational, but I tend to equate a counterweight with an admission of failure. It’s only there because I failed to plan or build correctly. That’s exactly what happened here, and I’m fine with admitting that — I just don’t want to be reminded of it every time I use the scope!
In the end, I decided on a two-prong approach. I’m going with the counterweight option for the short term. I’ll use the scope this way a while, and then as time allows, I’ll re-do the side bearings and modify the rocker box to match. And I’ll keep reminding myself that things going wrong is just part of the whole telescope-making process.
Day 24: First-Light Delight

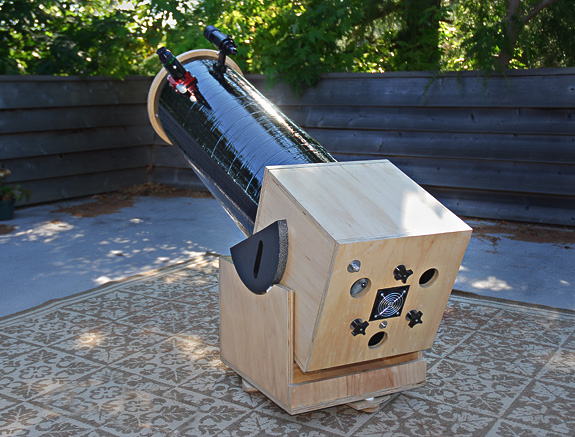
Awaiting darkness. My just completed 12¾-inch Dobsonian is ready for action.
After producing enough sawdust to fill an Olympic-sized swimming pool, and after too many quality hours spent with power tools, the scope was finally fully assembled and ready to drink up star light. Readers of this series know that the journey had a couple of detours and that there were a few bumps in the road along the way, but now that’s all in the past. First light awaits!
I wont’ keep you in suspense: the scope worked great. Having used these optics previously in the scope’s original airline-portable configuration, I wasn’t surprised by what I saw during first light. Yes, the 12¾-inch primary still delivers excellent views. Good. On this first night, however, I was mostly interested in the scope’s ergonomics — that was the real focus of this rebuild project. And I’m happy to report that the scope moves like a dream. Its motions are smooth and easily controlled, requiring just the right amount of force to initiate and maintain. This is due to the use of a counterweight (discussed in Day 23) and an extra Teflon pad, which I’ll describe in a future Telescope Diary.
Under the stars, I was again reminded of how well this size of instrument works. In my estimation, it’s nearly ideal. The scope is about as big as can be easily managed — it fits into the car without a great deal of effort and I can use it without having to stand on anything. And I’ve always felt a mirror this size pulls in enough photons for satisfying deep-sky views. For years I observed with a friend who carted around a 17-inch Dob. We’d often look at the same things and compare the views in his scope and my old 12½ inch. Those sessions illustrated that, for me at least, the jump in aperture from 12 to 17 didn’t provide enough of a difference in the eyepiece to justify the extra bulk and effort the bigger scope necessitated. Yes, things unquestionably looked brighter in the 17 inch, but it was a rare (and usually uninteresting) object that the 17 could pull in that the 12 simply couldn’t. Don’t get me wrong — I completely “get” the appeal of big aperture. It’s just that I value portability, ease-of-use, and wider fields of view more than I do the extra light. So, for me, a 12¾-inch scope is a great fit. First light merely confirmed this.
Using the refurbished 12¾ for the first time was also a bittersweet occasion. This scope wouldn’t have been built without the generous guidance I received over the years from my dearly departed friend Lance Olkovick. There’s a lot of Lance in everything I build, but especially this particular Dob. I’m certain I’ll have many enjoyable nights with the scope, but I also know that no matter what, the stars will always shine with diminished brightness because of Lance’s too-soon passing.
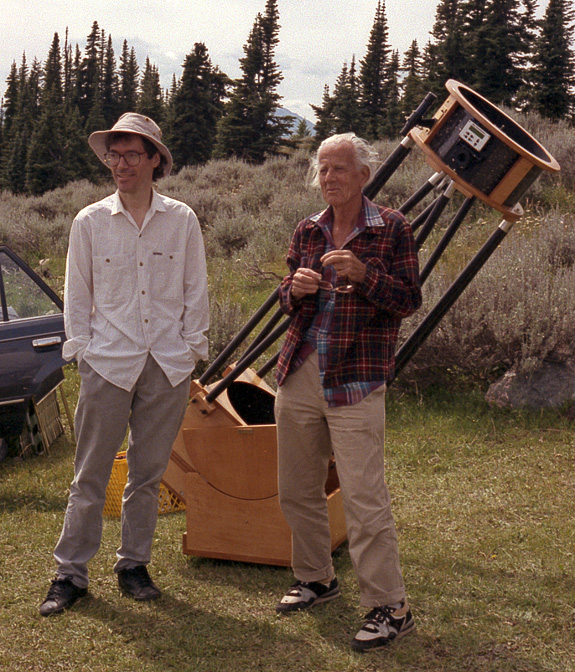
Lance (left) and a pair of Dobs — John Dobson and one of Lance’s beautifully crafted Dobsonian telescopes at the 1993 Mt. Kobau Star Party.
Day 25: Things Go Right
With the final modifications completed, the scope is at last finished. At least for now…
The balance issue detailed on Day 23 was eating away at me, so I broke down and decided to make the necessary modifications after all. I’m glad I did. The work wasn’t as bad as I feared, and the results turned out better than I expected.
One of the old side bearings lies atop one of the new. They are different by only 3/4-inch in radius.
The rocker box is attached to a jig to ensure that the arcs routed into both sides are identical.
To eliminate the need for a counterweight, I decided to move the scope’s balance point forward by making new, larger side bearings and modifying the rocker box to accommodate them. I glued together two ½-inch thick scraps of MDF (medium-density fiberboard) to yield a 1-inch thick piece, from which I cut the new side bearings with my trusty router. (Actually, the bearings came out thicker than 1-inch because wood thicknesses are never what they’re stated to be for some reason.) I had to move the balance point 3/4 inch forwards, so the radius of the new bearings needed to be 3/4-inch larger than the original ones.
The new bearings, of course, no longer matched the mating curves in the rocker box sides. Modifying the rocker box wasn’t something I was eager to do since ensuring that the curves on both sides of the rocker would match exactly was bound to be a challenge. Not only did the radii of the curves have to match (which is pretty easy to do), but the position of the curves and their depth also needed to be the same. To accomplish this, I set up a jig to hold the rocker box in place and to precisely position the router.
Happily, everything went smoothly. The curves came out nice and neat, and after some painting and sanding, the scope was reassembled for a test drive under the stars. And that, I have to say, was a pure joy. The scope moves wonderfully. With a modest push, I can slew from target to target and track objects at high power without any jumpiness to the motions. That might sound like a minor accomplishment, but since it really was the point of this whole exercise, it is a big deal. And after all, a Dobsonian telescope is all about how smooth and controllable the motions are.
So now, the rebuild project is finally done. Of course, there’ll be the inevitable tweaks and modifications – no telescope is truly ever finished. But at least I now have the no-compromise observing machine I wanted. I expect that this will be my main scope for many, many years. Or at least until I decide to build something bigger and/or better.
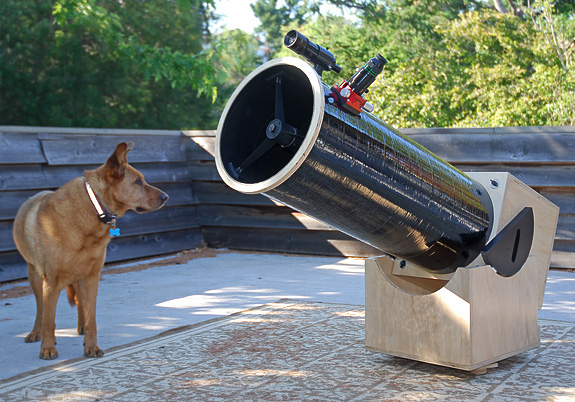
The dog and the Dob. Sam inspects my newly completed telescope while we await sunset.
Did you find this article interesting or helpful? If so, consider using this link the next time you shop at Amazon.com. Better yet, bookmark it for future use. Thanks to Amazon’s associates program, doing so costs you nothing yet helps keep this site up and running. Thanks!