
Aligning the optics of your reflector telescope is crucial for optimal performance — all the more so if you have a telescope with a focal ratio of f/5 or less. A good tool can make the difference between successful collimation, and an exercise in frustration that encourages you to settle for “good enough.” But selecting the right tool can be more confusing than actually using it. On-line discussions offer a bewildering array of opinions and experiences — some of which posted by people who make and sell the products they (naturally enough) recommend. So what do you really need to collimate your scope?
Here is a rundown of the various collimation tools commonly available, and their relative strengths and weaknesses. My evaluations are based on several decades of making and using reflector telescopes. All the devices discussed below can produce satisfactory collimation. What generally distinguishes one from another is not accuracy, but rather, ease of use and cost.
Option #1: No Tools
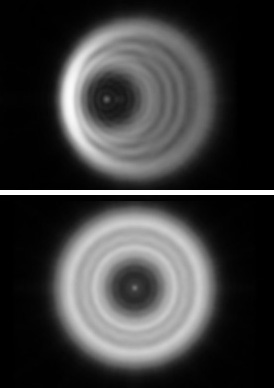
Yes, it is possible to collimate your reflector without any tools. It’s called the “star test.” The detailed ins and outs of this method are beyond the scope of this article, but essentially you centre a bright star in the eyepiece, throw it out of focus, and note where the shadow of the secondary mirror is positioned within the expanded disk of light. It should be centred. The test becomes progressively more sensitive the nearer you get to focus. Regardless of what other collimation method you use, the star test is the final arbiter of optical alignment. If it looks right in the star test, it is right.
Best features: You can do it without spending a single dollar. No centre dot is needed on the primary mirror.
Worst features: The method takes some experience and isn’t the best choice for absolute beginners. It’s also usually more time consuming than other methods and requires a star (or point-source light). It’s also not the best way to ensure the secondary mirror is correctly placed.
Accuracy: Dead accurate.
Ease of use: For the highest accuracy you’ll need a night of good, steady seeing. Experience will make the method more reliable and effective.
Option #2: Collimation Cap
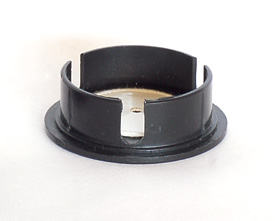
Possibly your telescope came with one of these. Orion Telescopes supplies them with their reflectors, as do some other manufacturers. The device is simply a plastic cap with a small hole in its centre and a reflective underside. If your telescope didn’t come with one, you can make one with an old plastic film canister. For 90% of the collimation I do, this is the tool that I use. The only time I usually need something more is when I’m assembling a scope from scratch.
Best features: Cheap and effective.
Worst features: Not the best tool for aligning the secondary mirror (though it can be done). Requires the centre of the primary mirror to be marked.
Accuracy: Very accurate if your mirror’s centre dot is correctly positioned.
Ease of Use: Very easy to use.
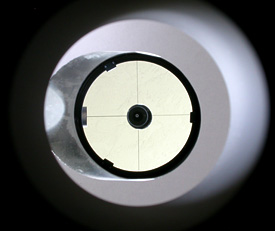
Option #3: Cheshire Eyepiece
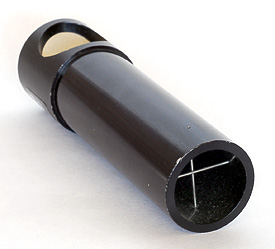
Not an “eyepiece” in the usual sense of the word, a Cheshire is a sight tube with a small hole at the top that you look through, and a shiny surface tilted at 45° and aimed at a large hole in the side of the tube. The version Orion (and others) sell also has a set of cross-hairs at the bottom of the tube for aligning the secondary mirror. This “all-in-one” collimation tool is excellent. Indeed, if you have one of these, you need nothing else.
Best features: One tool that does it all. Relatively inexpensive.
Worst features: In the dark you’ll probably need a red flashlight to illuminate the shiny surface of the collimation eyepiece. Requires a centre-dotted primary mirror.
Accuracy: Very accurate if your mirror’s centre dot is correctly positioned.
Ease of use: Easy to use.
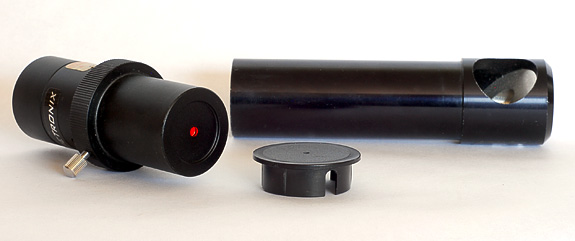
Option #4: Laser Collimator
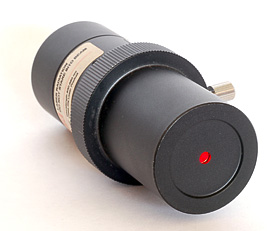
Laser collimators have been around for many years now and seem to be especially attractive to those who equate lasers with precision. Unfortunately, it’s been my experience that beginners all too often end up de-collimating their scopes when using one of these. Why? The Achilles heel of the laser collimator is that its accuracy depends on how carefully you’ve adjusted your scope’s secondary mirror — a procedure that is far more difficult than it is important to image quality. In other words, if your scope’s secondary mirror isn’t set correctly, you can actually achieve a “pass” by putting your primary mirror out of alignment — a situation that can have disastrous consequences when it comes to image quality. That said, I have a laser collimator and find it a useful tool for adjusting the tilt of the secondary mirror. I don’t recommend it for adjusting the primary, however.
Best features: Can be used in the dark. Useful for adjusting the secondary mirror.
Worst features: Can lead to miscollimation. Batteries required. Expensive relative to benefits. Requires centre of primary to be marked.
Accuracy: Potentially accurate if used correctly. Accuracy dependent on mechanical alignment of the laser within its housing and how the device seats in the focuser. Accuracy highly dependent on positioning of the secondary mirror.
Ease of use: Relatively difficult to use successfully.
Option #5: Barlowed Laser
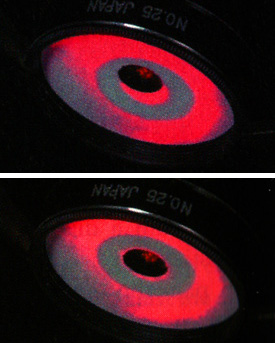
The Barlowed laser is the newest approach in the collimation game. Most people heard about it the first time when Nils Olof Carlin’s article appeared in the January 2003 issue of Sky & Telescope (page 121). As editor of the telescope-making department, I had the privilege of working with Nils to bring this to the pages of the magazine. Essentially the setup consists of an ordinary laser collimator used in conjunction with a Barlow fitted with a target attached in front of the lens. You can also purchase Barlowed lasers from commercial sources such as Howie Glatter and Kendrick Astro Equipment. Unlike a plain laser, the Barlowed version works very well and avoids the pitfalls of the former. This is my favourite method for collimating in the dark.
Best feature: Works well in the dark.
Worst features: Can be relatively expensive. Requires the centre of the primary mirror be marked.
Accuracy. Very accurate.
Ease of use: Very easy.
Recommendations
The five options described above cover those most commonly available and frequently used. With varying ease, all of them can help you accurately collimate scopes — even those with fast (under f/5) focal ratios. There are other tools and systems, but mostly they are either variations of those covered here, or devices that increase the complexity of the operation without a corresponding improvement in accuracy.
For most people, a simple collimation cap is fine. The Barlowed laser is also a good option, especially if you already have a Barlow lens in your eyepiece box. If you do most of your collimation in the dark when you arrive at an observing site, this is the way to go. Nearly as convenient and useful is the Cheshire eyepiece. The important thing to remember is that you don’t have to get a bunch of tools — one chosen with care is all you need. Take the time to learn how to use it well and you won’t need another.
I’m purely a visual observer and mostly use scopes that are shade over f/4. For collimation I use either a Cheshire or laser to position the secondary mirror (something that rarely needs adjustment) and a simple collimation cap for tweaking the primary. That’s it. My scopes are always perfectly aligned, something I can quickly verify with a star test. Collimation rarely takes me more than a minute and most nights all I do is check to see that everything is okay since I last used my scope. There’s really no reason to spend any more time on it than that.
If you want to read more about collimation, I can recommend Nils Olof Carlin’s excellent piece, Some Collimation Myths and Misunderstandings That article should fill in most of the gaps arising from the brevity of this overview.
Did you find this article interesting or helpful? If so, consider using this link the next time you shop at Amazon.com. Better yet, bookmark it for future use. Thanks to Amazon’s associates program, doing so costs you nothing yet helps keep this site up and running. Thanks!